Introduction
There are several best practices to add a layer of security for all the management of any application living in the cloud. If you are on Amazon Web Services (AWS) and you manage or have a dedicated team in charge of security, trust me, using the Identity and Access Management (IAM) service for all the management and attaching only the necessary policies to it, will increase all your management and add a second security layer to all your environments.
The purpose of this blog is to show all the CEOs, CTOs and business owners how to increase their AWS account security using the IAM Service. You will be able to create IAM Users with existing IAM policies which allow you to grant access to specific resources on AWS, providing them a better management for all their applications, environments, servers and resources.
Enhance your AWS Account Security using IAM Roles
On this blog, I’m going to show you how to use the IAM Service on AWS and how to create users and attach different policies to them. Depending on the type of user you want to create, you will select different access types which are Programmatic access and AWS Management Console access. For this, we are going to use AWS Management Console Access and attach the “Administrator access” policy to our user, in case we want to add more users or services.
Step by step
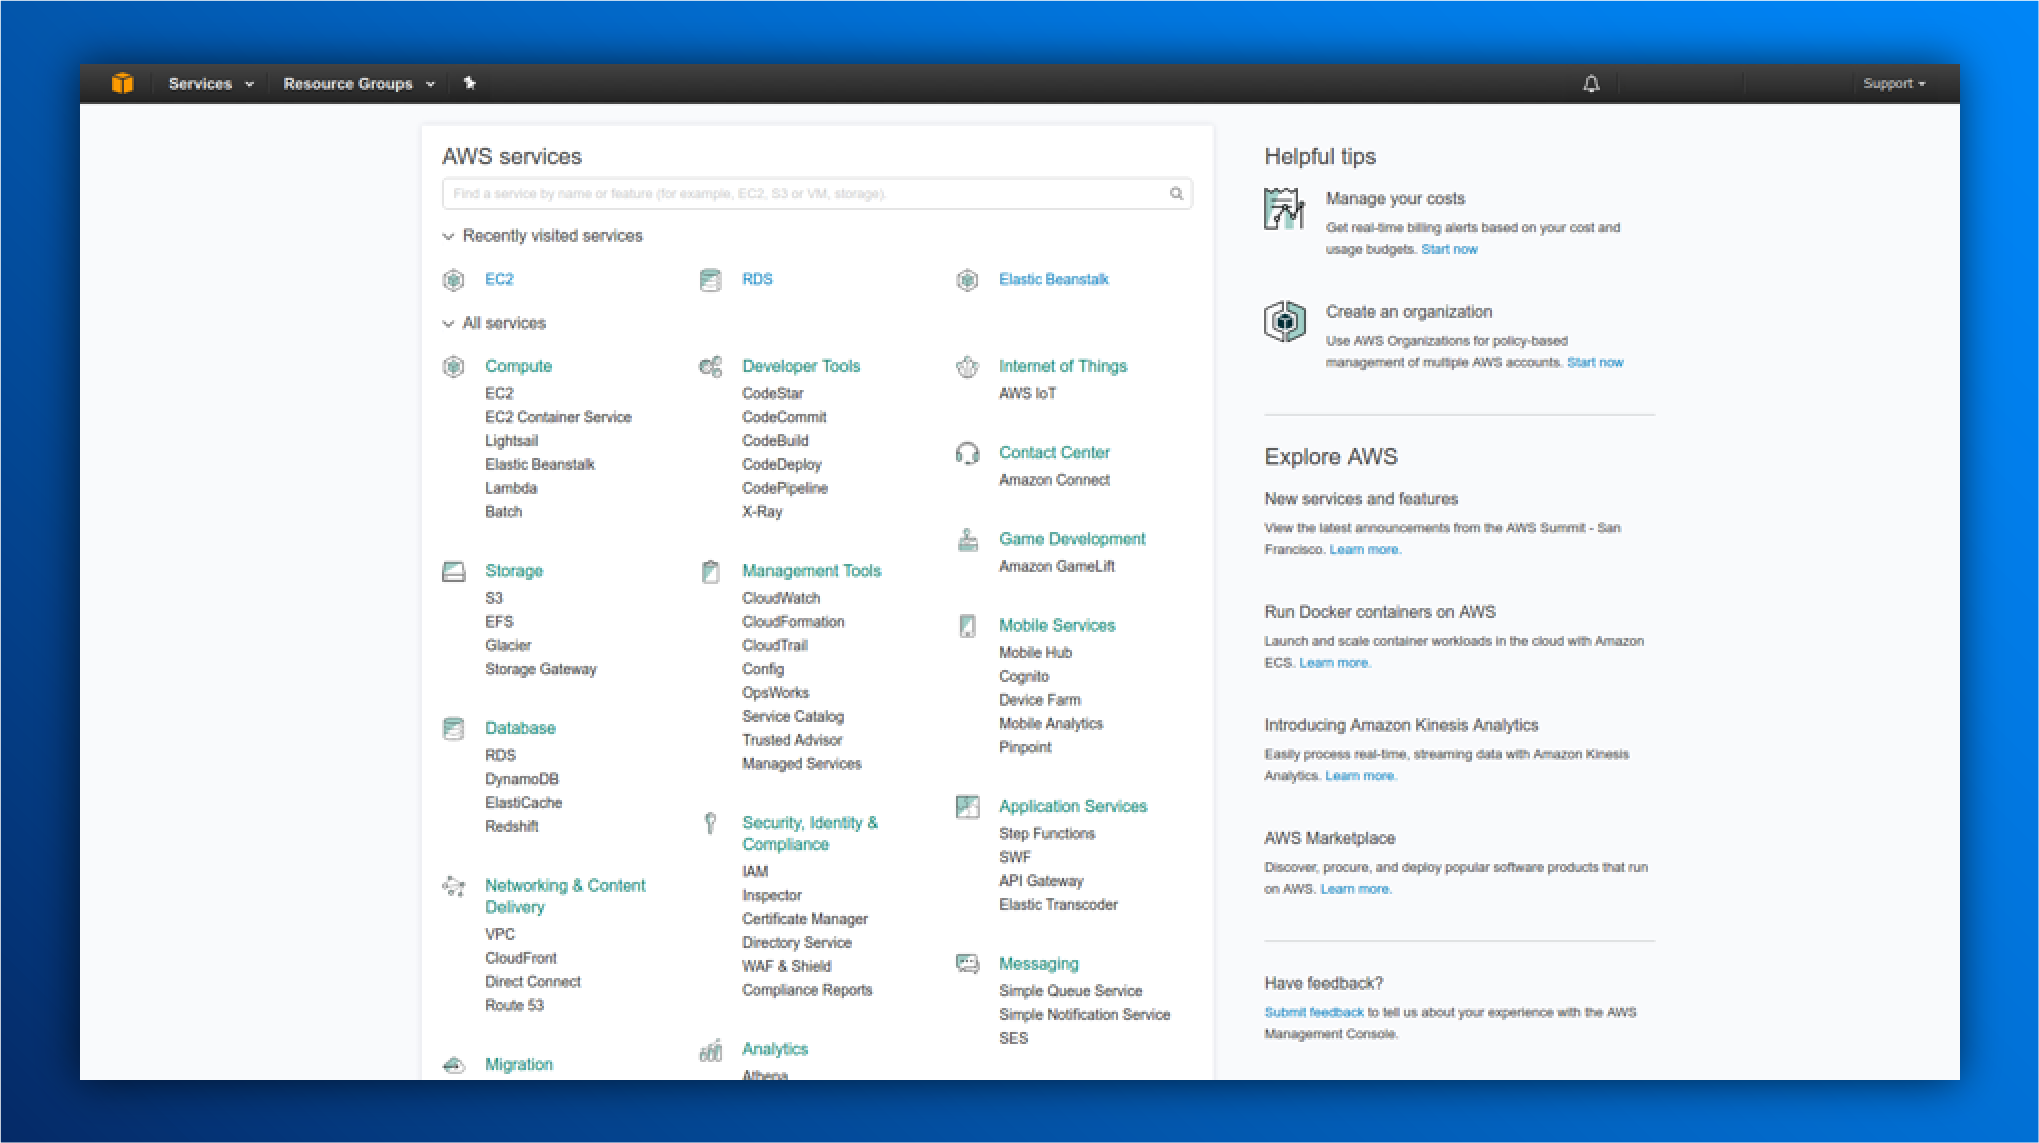
1. Log into your AWS Account. On the main page, you will be able to see all the AWS resources that you can use to develop any application. In this case, we are going to use “Security and Identity Compliance Module” – IAM Service.
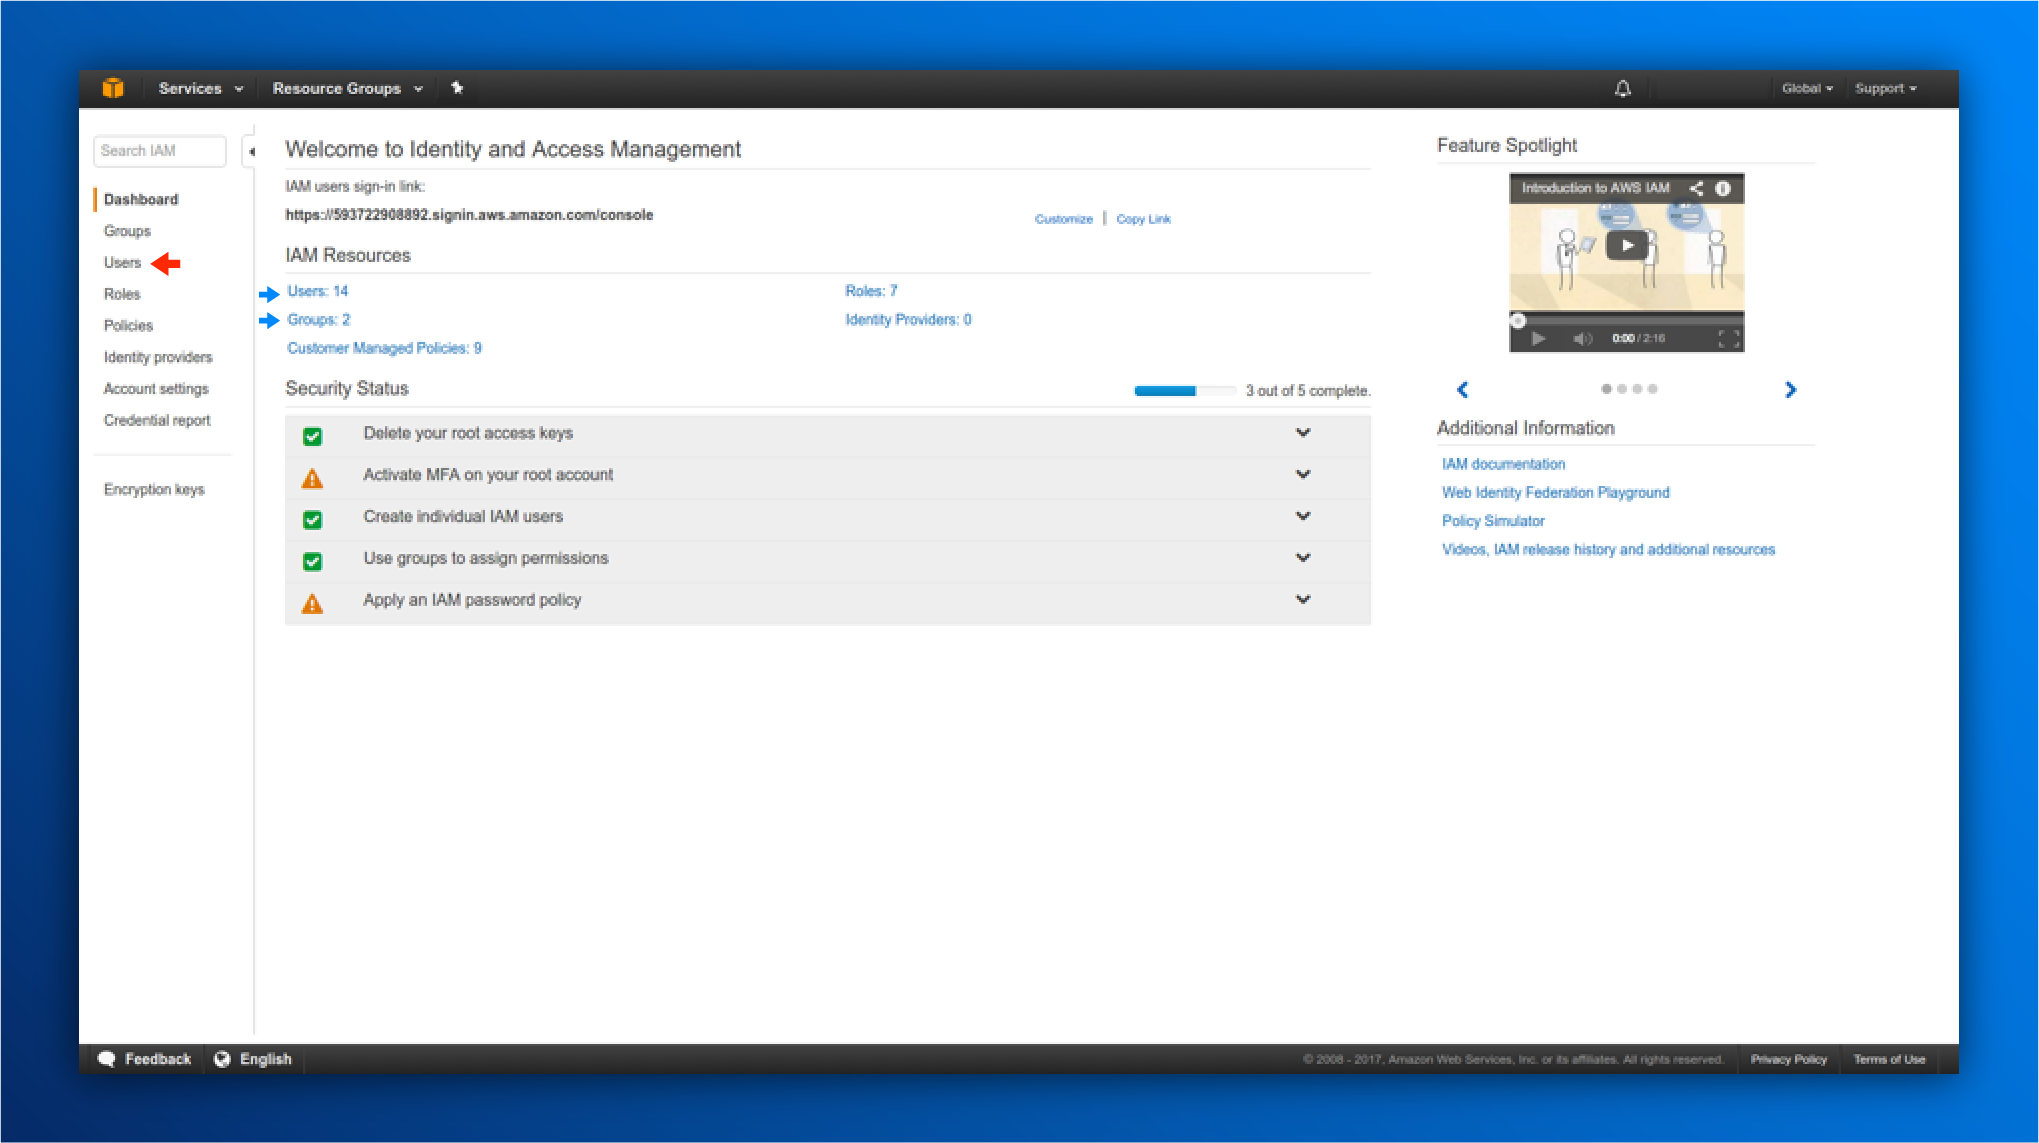
2. At this screen you will see your user statistics, the number of users, groups and roles your account has. Let proceed with the user creation, Click on “Users tab”.
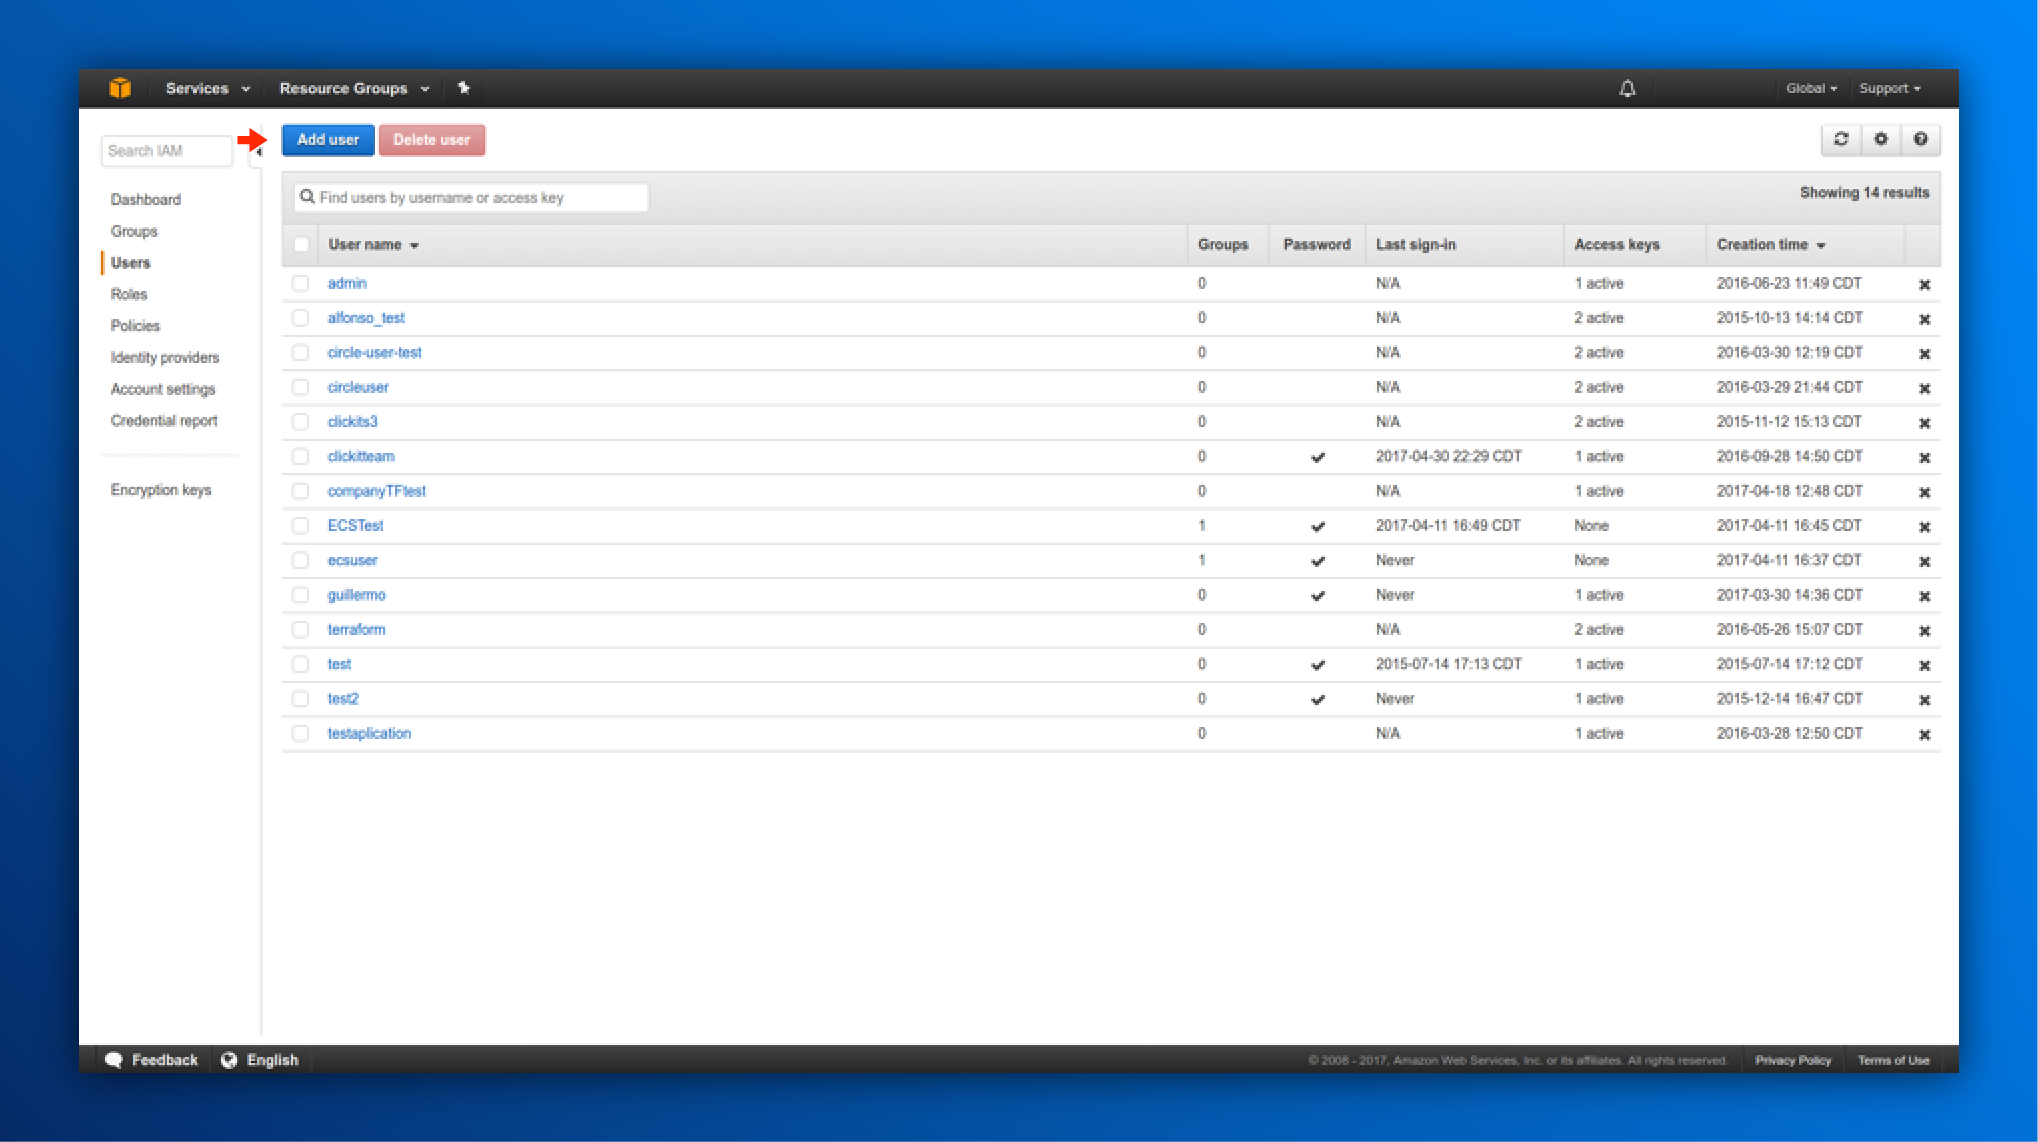
3. Click on “Add user.”
4. Fill the user name space with the name of your user. Check the box “AWS Management Console” it will display two more things: Password options and Require password reset (recommended). You will have something like this:
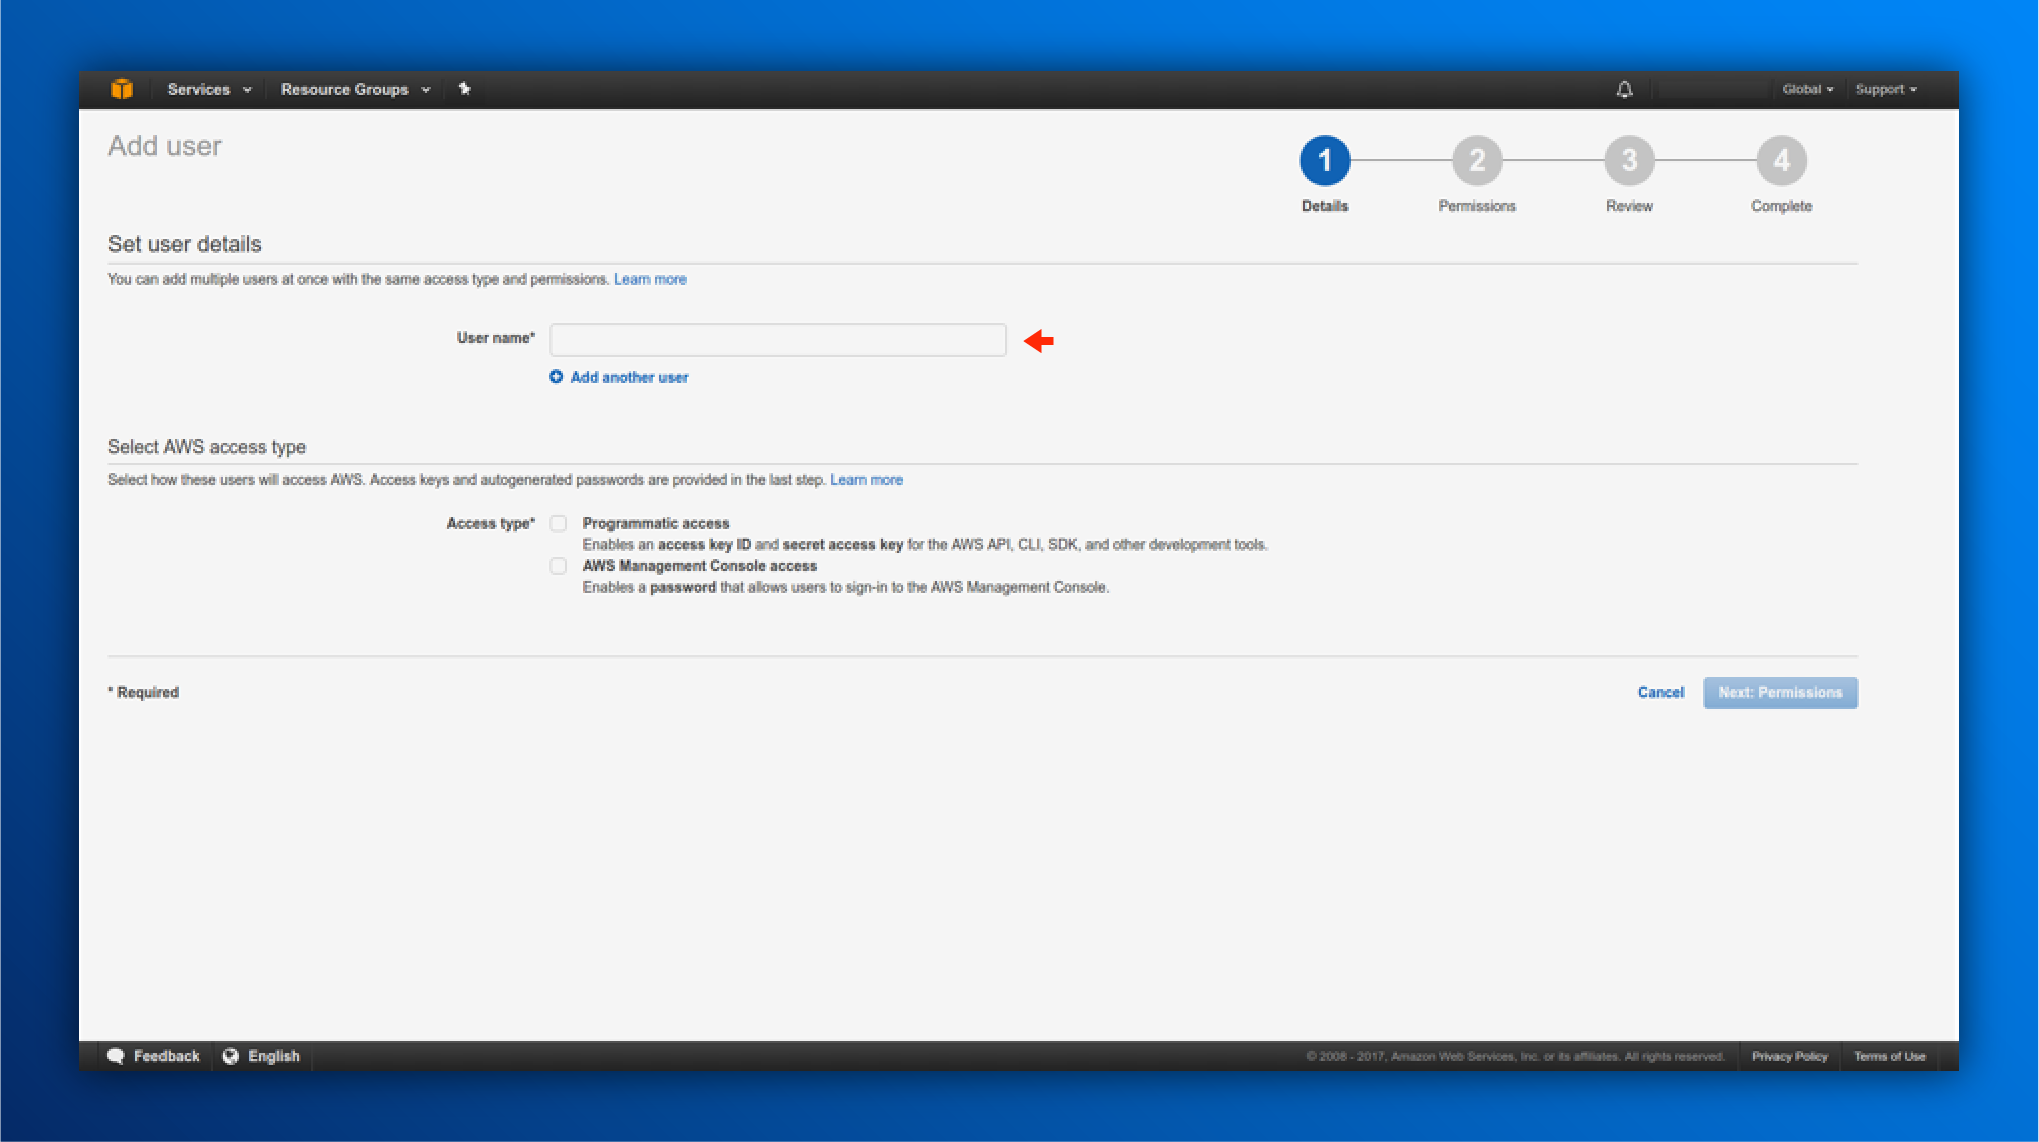
5. Click on “Next: Permissions”.
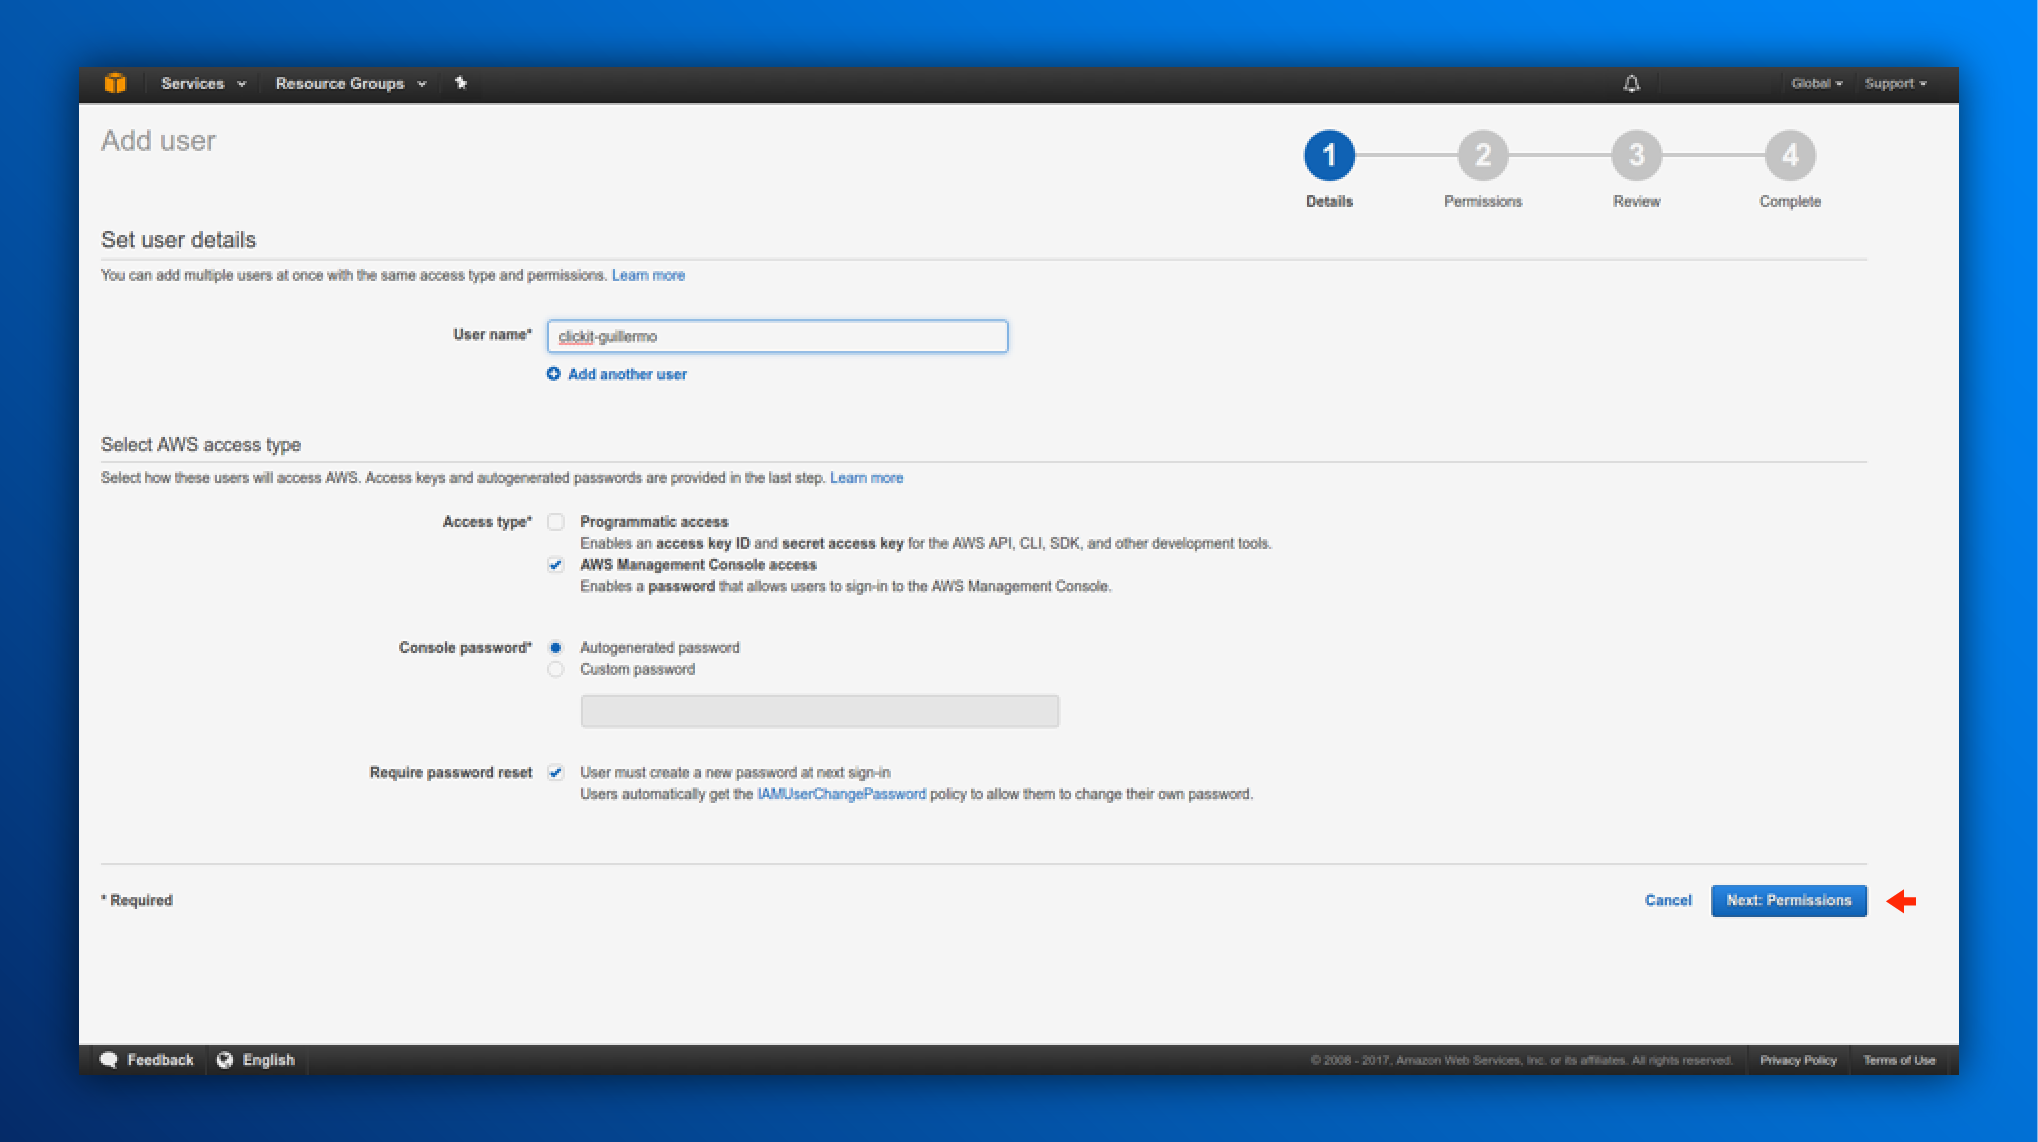

6. At this point, make sure to attach only the required policies for this user. In this case, I’m going to attach: “Administrator Access” Policy, now click on Attach existing policies directly and type in the search box: “Administrator”.
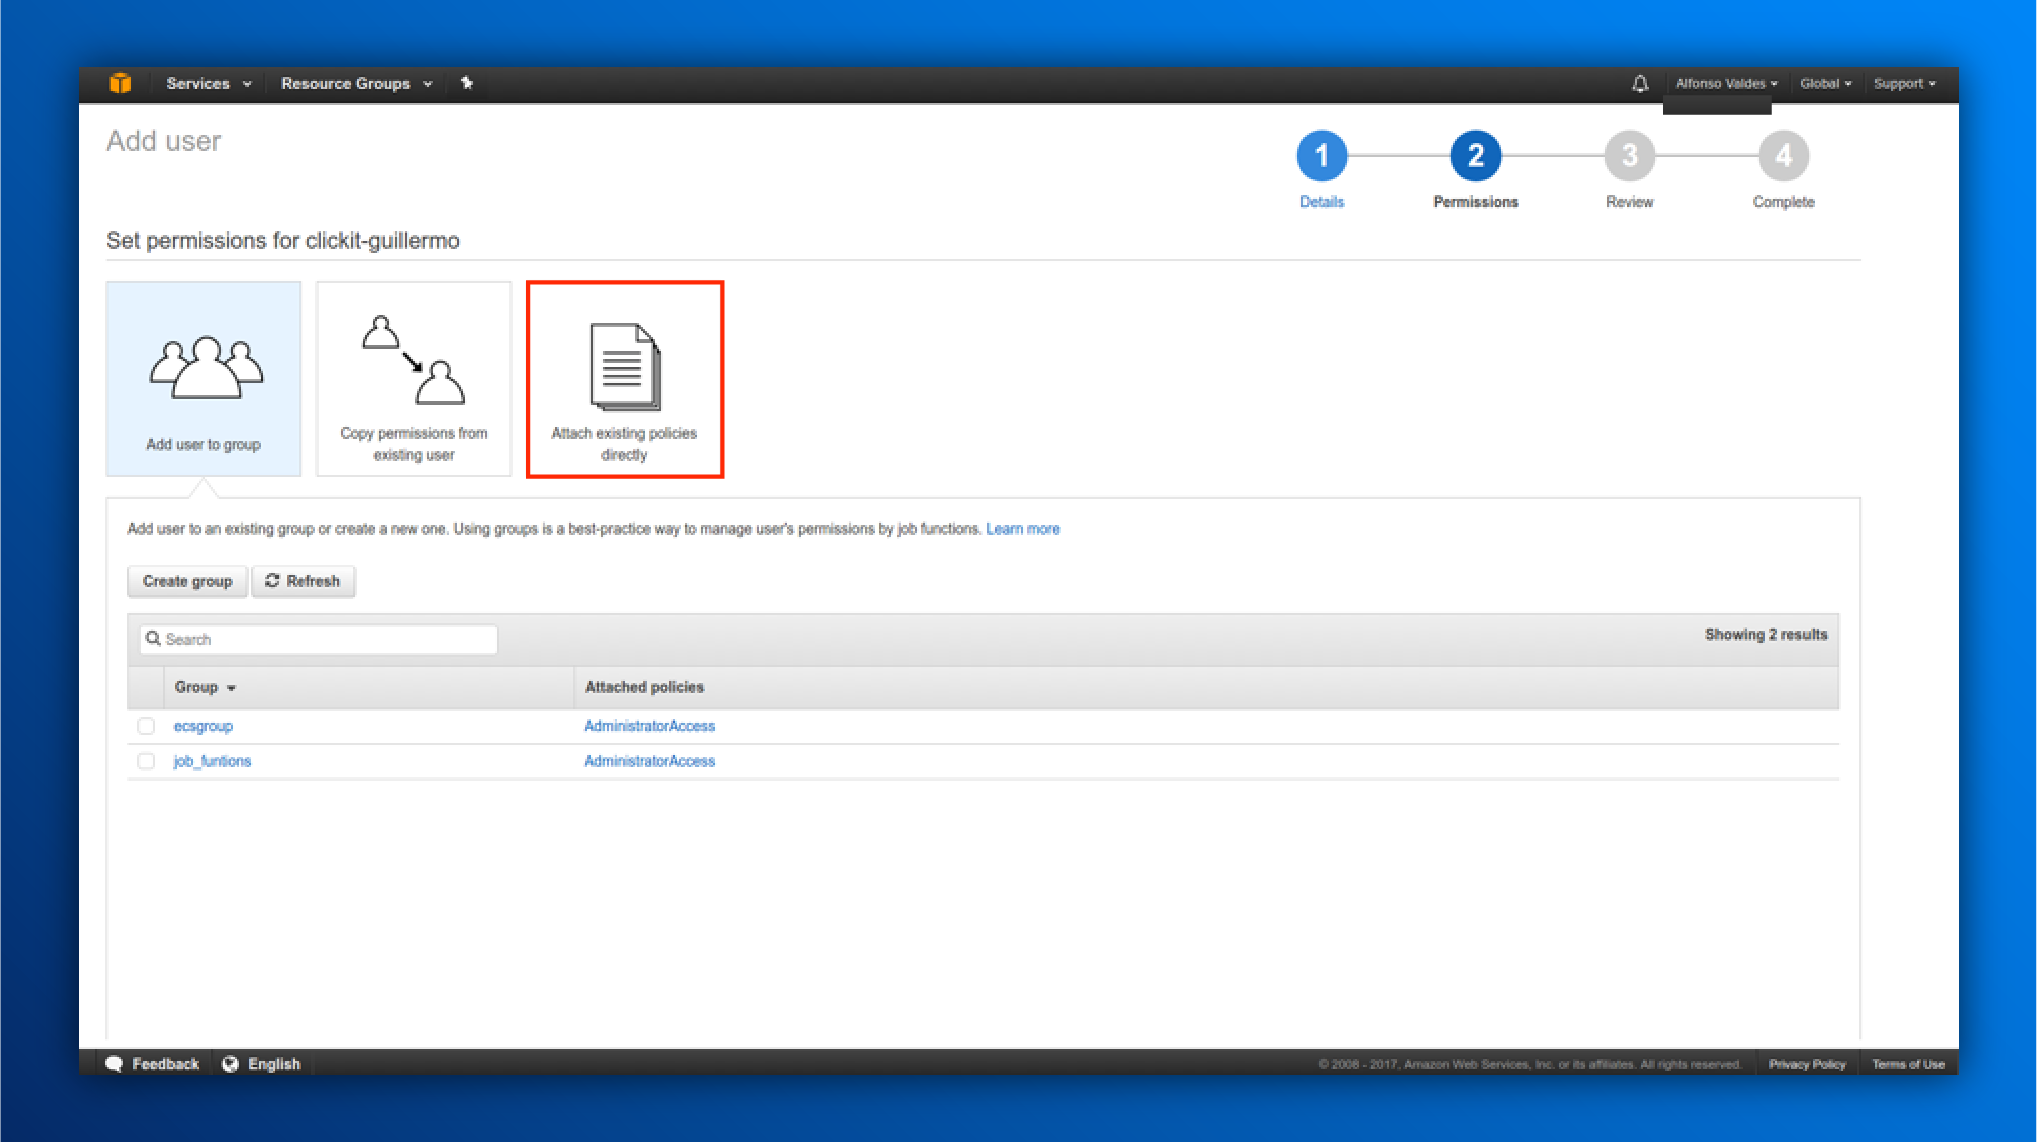
7. You will be able to see the policy, details and description. Check the Box for the policy and click on “Next: review”.
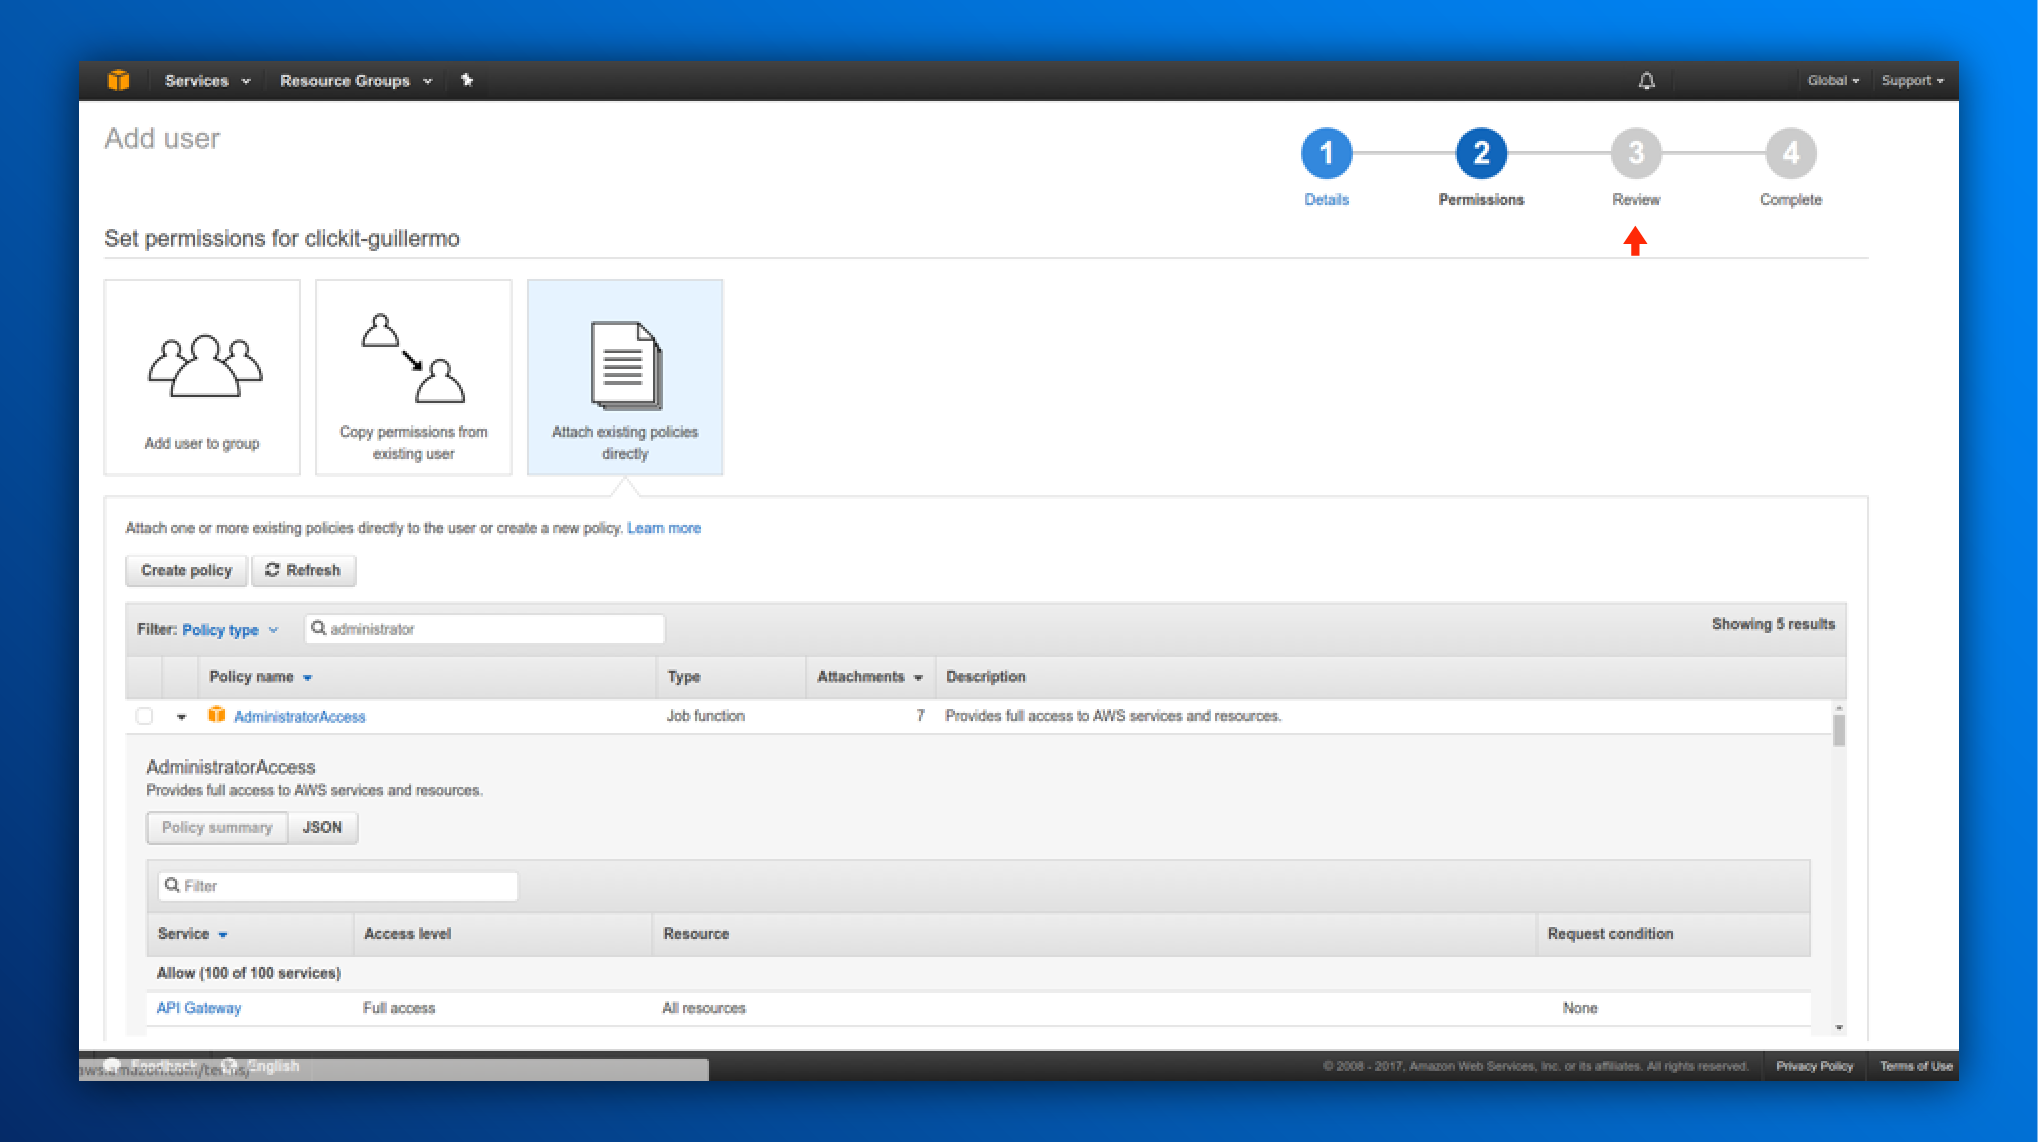
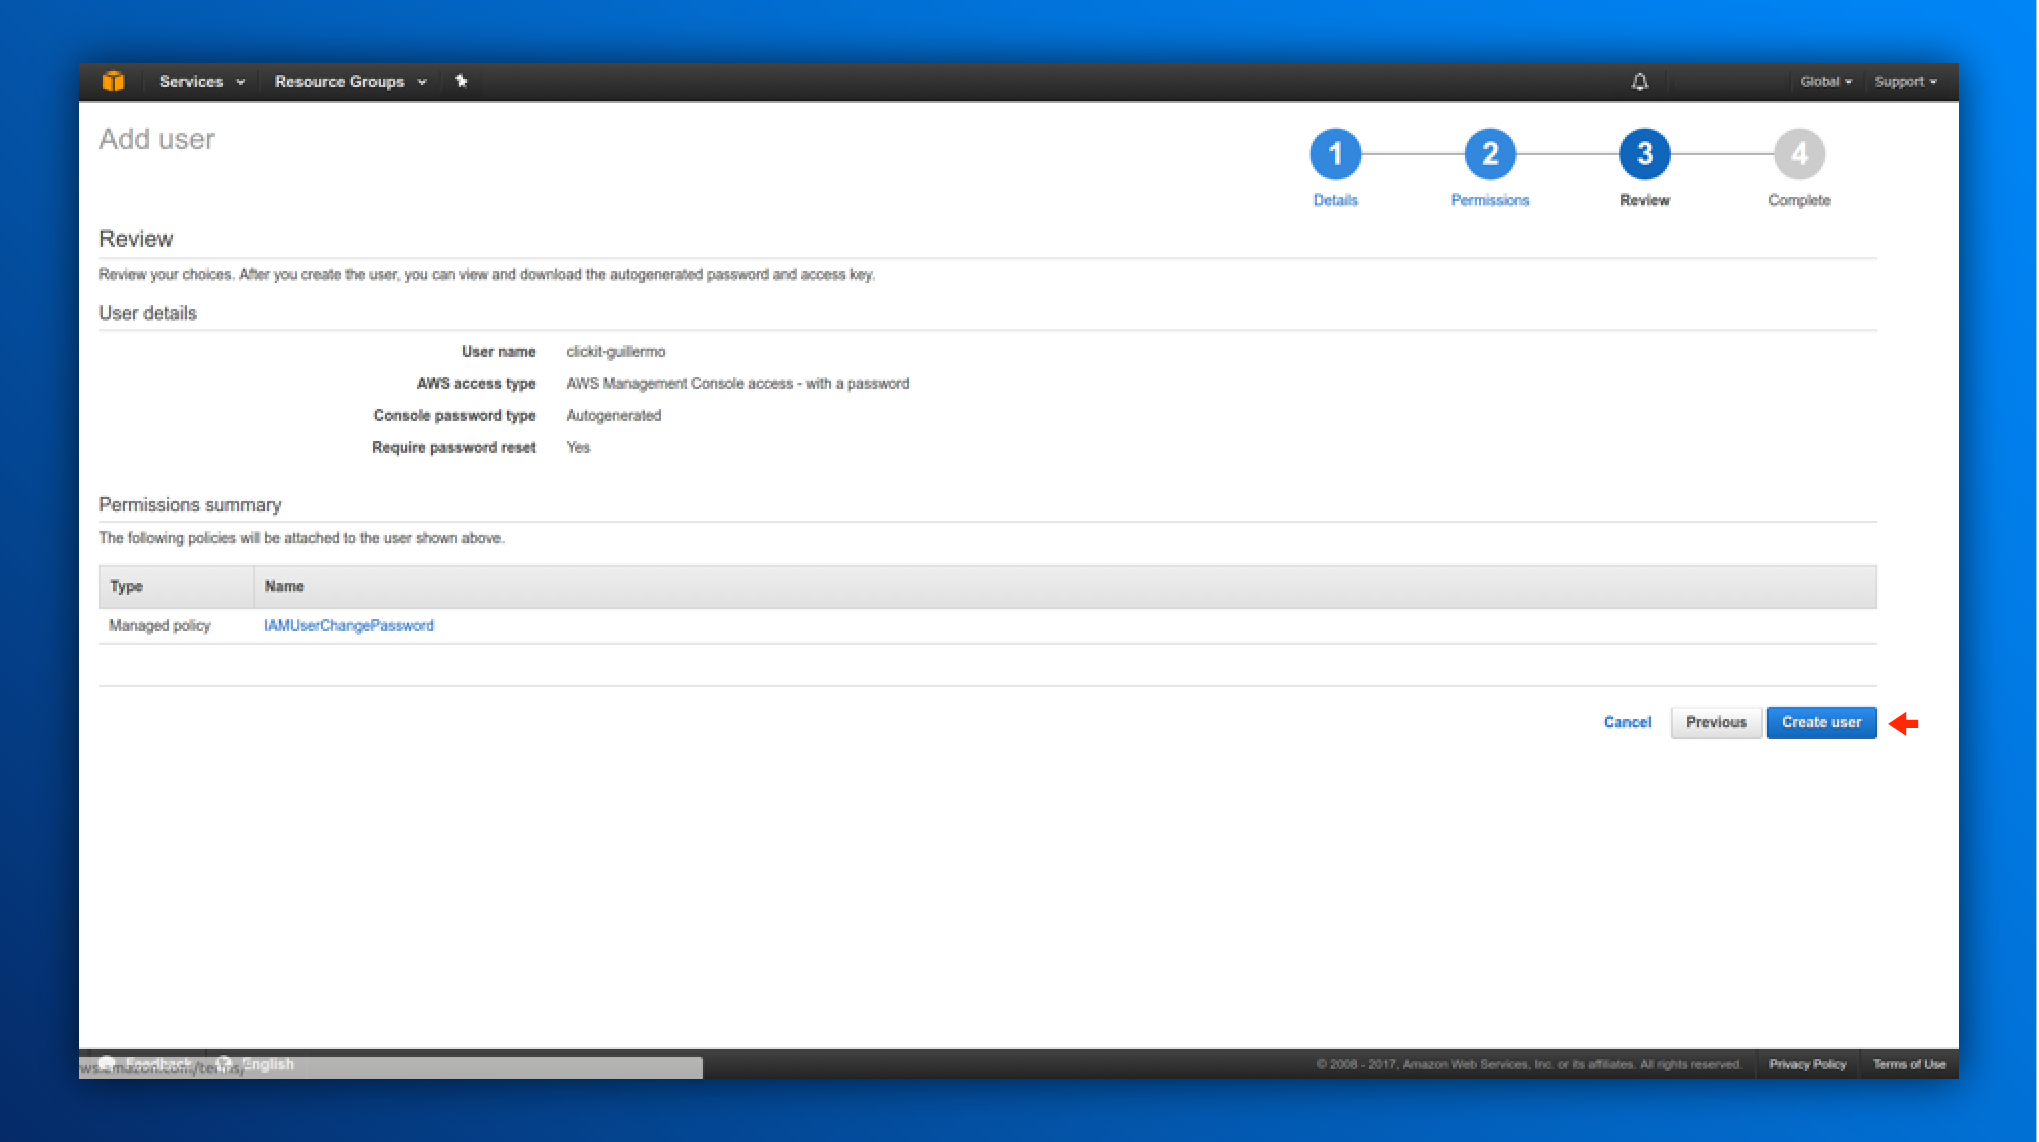
8. At this phase, we will review all the user’s specifications we provided previously. Make sure to review the attached policies assigned to the user, so after your review and if everything is ok, click on “Create user”.
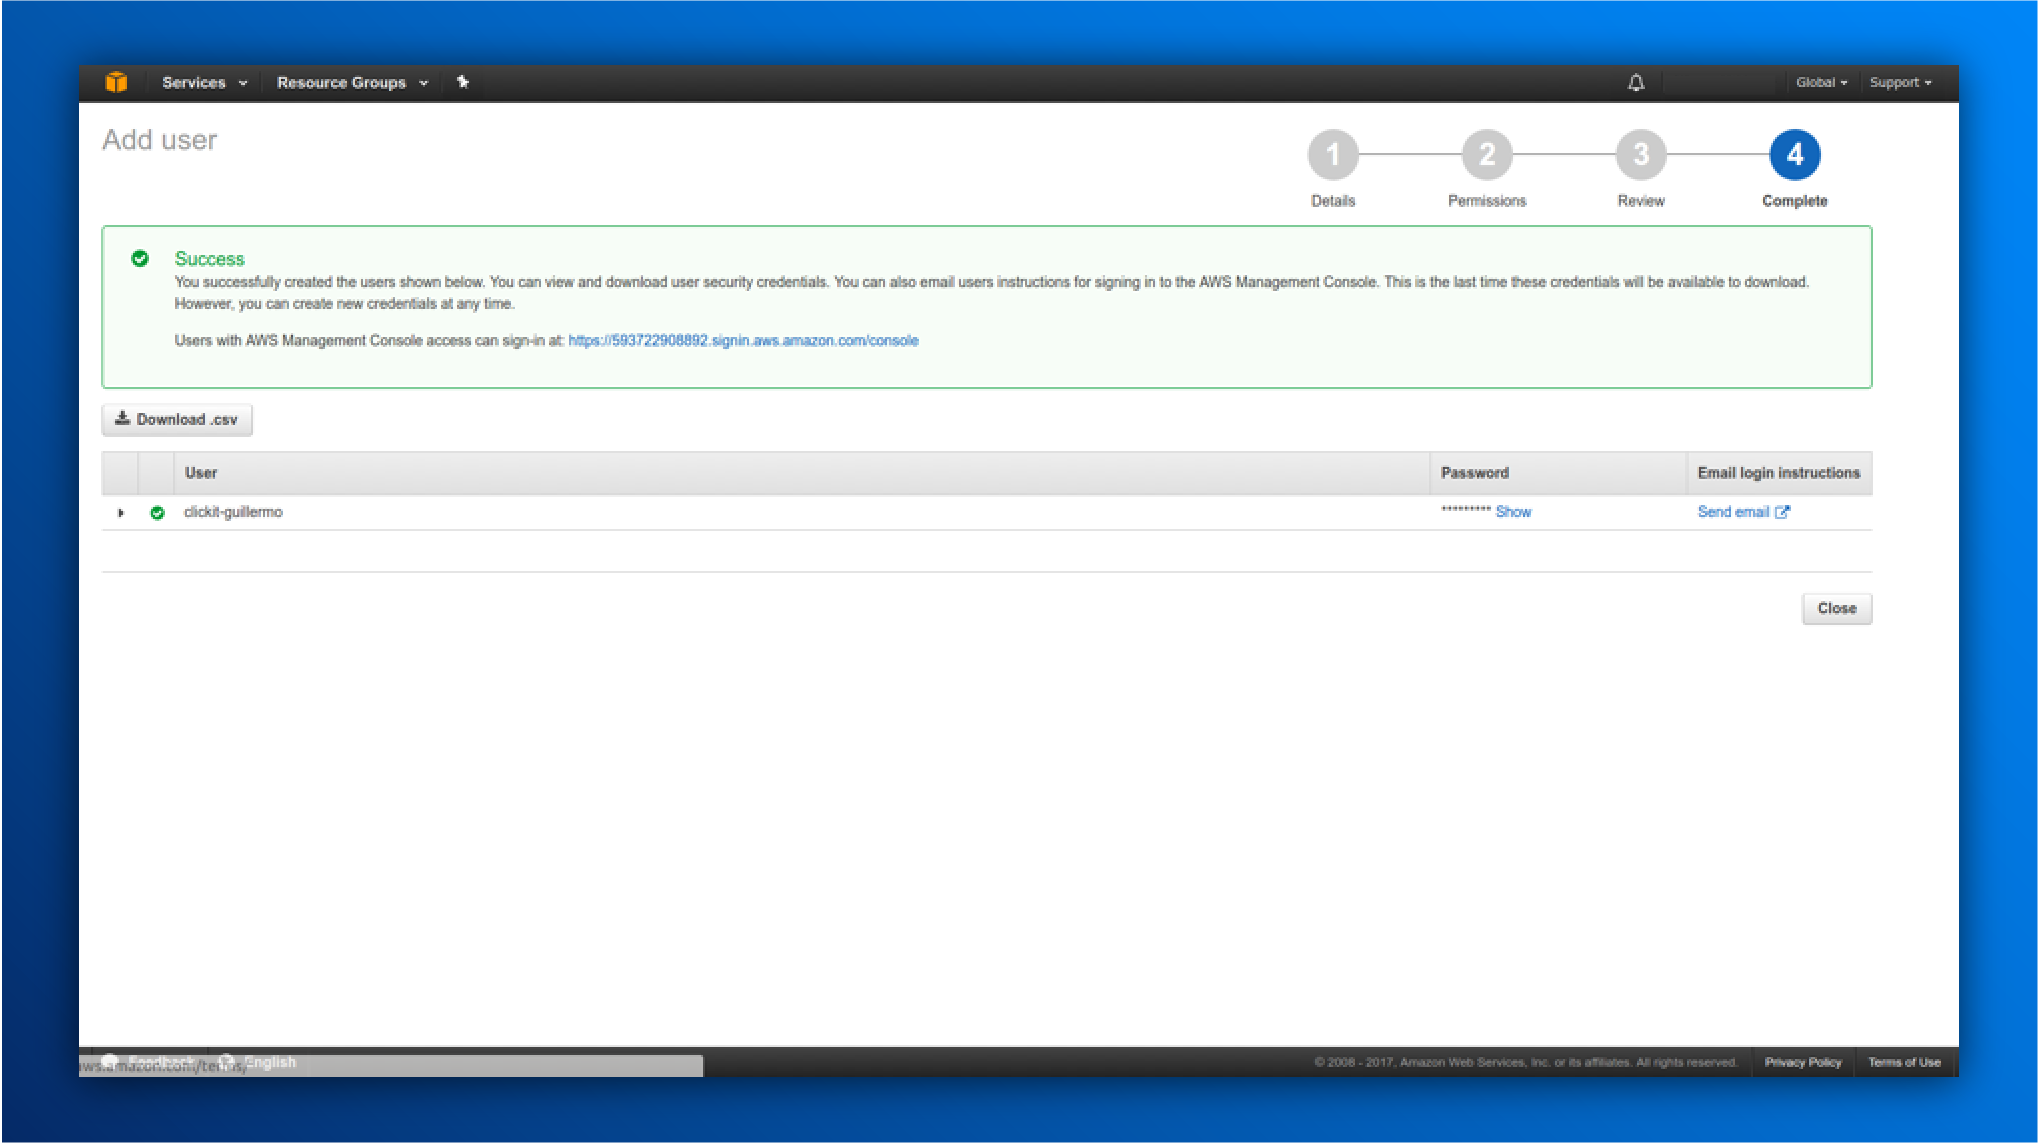
9. The next screen should look like this: with a successful message. You will be provided by:
- 1 Access URL.
- A button to download the user details on CSV format.
- Password for the user.
- Send via Email Button.
Now your IAM User is created.
10. The creation is now completed, the user you created will be able to access the resources assigned.
Conclusion
With this tutorial, you are now able to create new users and delegate permissions based on the defined politics by AWS. An IAM User is needed when someone new joins your organization or when you have a new app that needs to make API calls to AWS. There are a lot of permissions that you can assign to a single user, and you can also add specific permissions to roles in which you are going to assign users from your team, but that’s another topic, create as many users as your company needs.
If you’re facing problems to create an IAM User and attach an access policy on AWS, contact us, our expert team can help you improve the process. You can also check my past blog Best AWS practices with IAM Roles or our Curacao case study for know more about the AWS Security.

