Do you have load problems with your server? Does the CPU reach 100% usage at times? Do not you want to change to a bigger server because with this one there are only “peaks” of load?
A slow and overloaded data website is a nuisance today, both for you and your customers. However, the slow loading of a server is not resolved with patches. One of the most optimal solutions for the servers is to create a WordPress with high performance and self-scalable, a practice that has become a necessity for any site.
Table of contents
But let’s see, What is a high-performance, highly scalable WP?
A WP of high performance is a WP that allows navigating by itself with easiness and rapidity, that is to say, it is fluid and its times of loads are very small. When we talk about self-scaling we mean to the infrastructure where the application is located, WP in this case, can increase the number of instances in order to be able to serve all customers/users as necessary. For this, are used certain parameters, in general, CPU utilization, to determine when the instances are reaching their capacity limit to meet the requests.
Let’s see the advantages and disadvantages
Advantages
- The speed of server for loading pages.
- The probability of failure of the WP is very low, almost zero, it will always be available.
- Increase the number of instances if necessary, but decrease them also when it is not.
Disadvantages
- The AWS billing would not be fixed, since the number of instances increases and decreases when necessary.
This series of tutorials presents a solution to your problem as I will explain step by step the creation and configuration of an infrastructure for a high-performance and self-scalable WordPress (WordPress Auto-scaling) with Amazon Web Services (AWS).
The topics that will help you with the whole process are: (Click on each one to learn more)
For this series of tutorials, it is recommended, as a minimum, a basic experience in Linux and AWS, although these tutorials are very detailed.
Part I: Creating the VPC
What is needed?
- An account in AWS
How to do it?
- Log in to the AWS account.
- Choose the region in which the infrastructure will be created (top right corner). In this case, we will use Virginia.

- Select the VPC service.

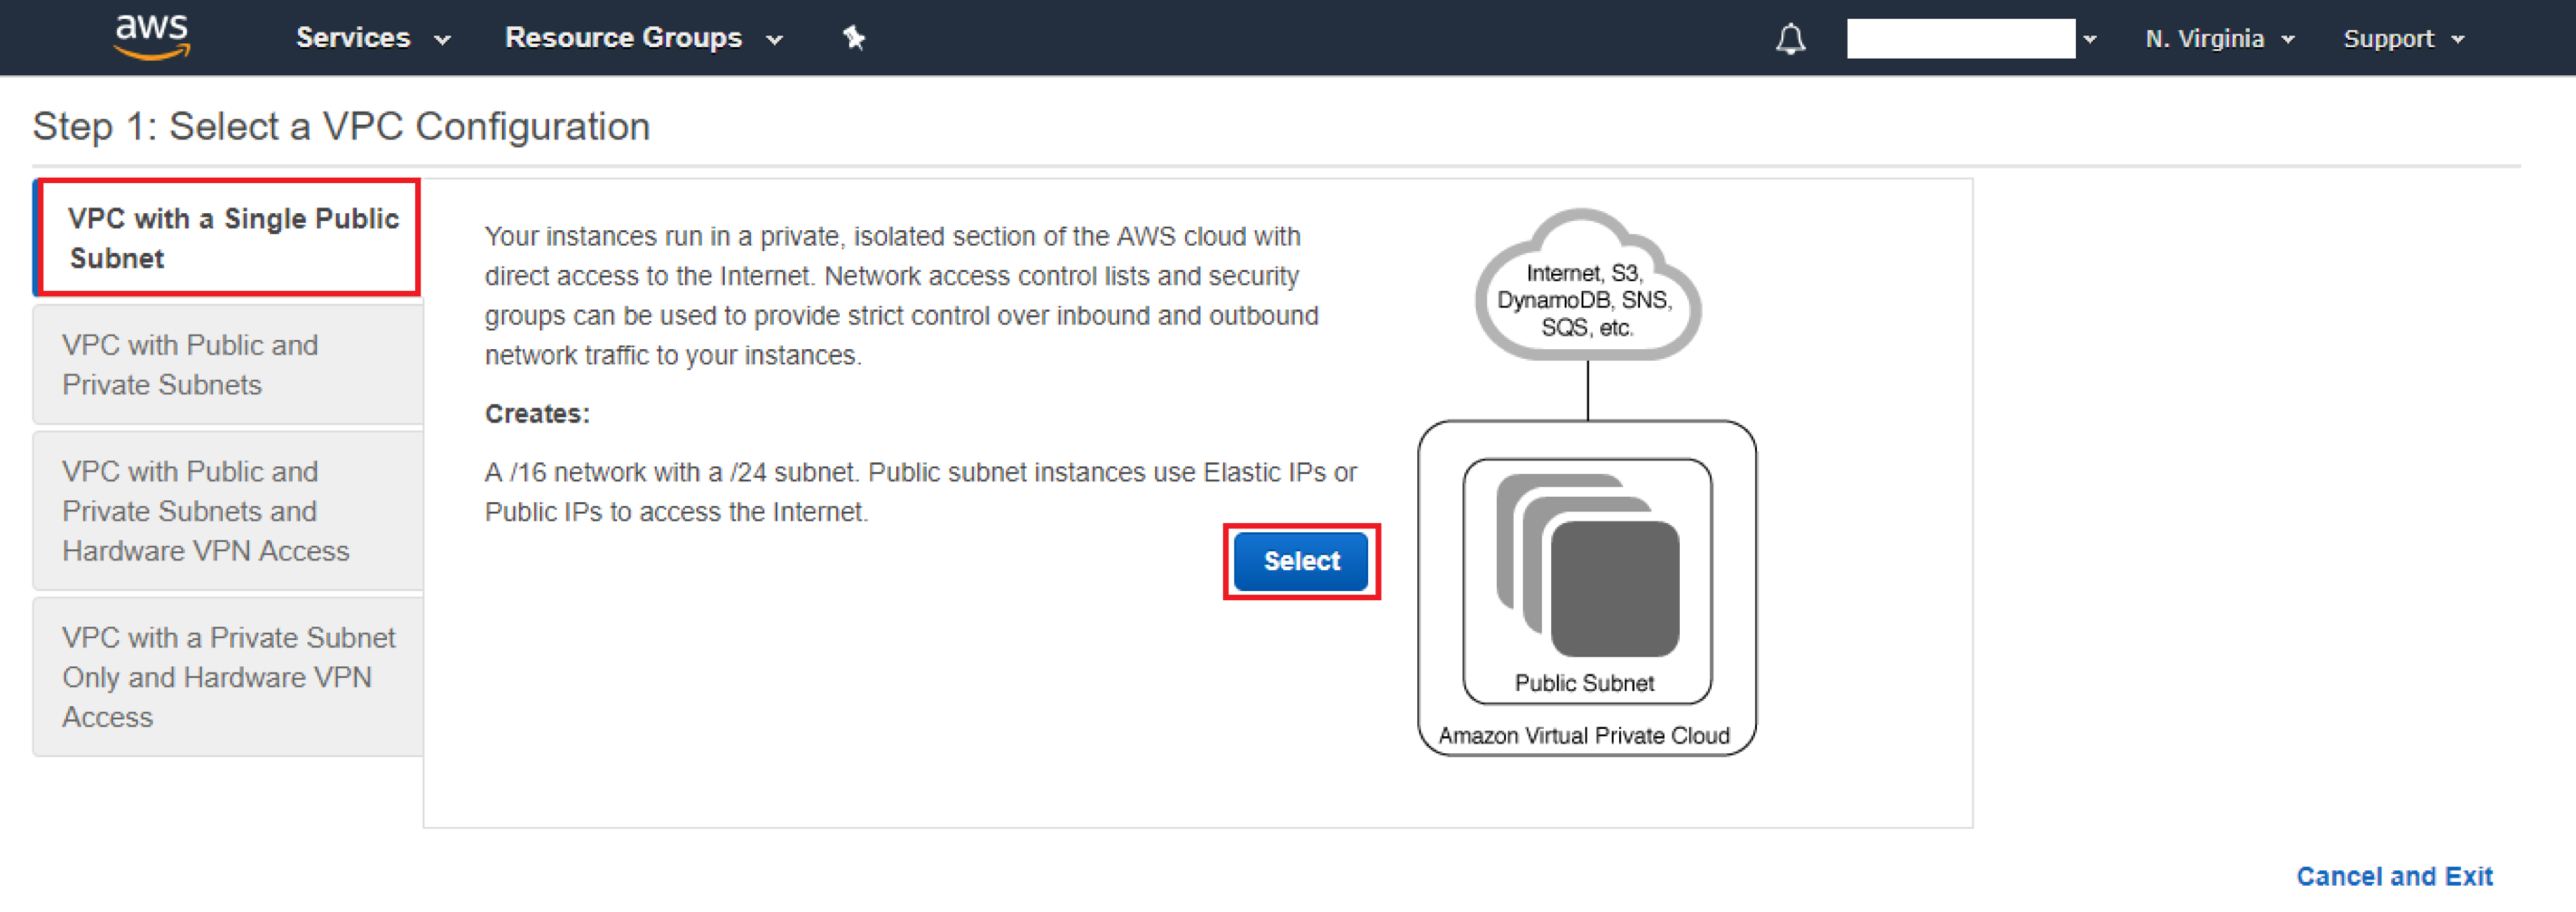
- Start your creation by clicking on “Create VPC” or “Start VPC Wizard”.
- Select the configuration of the VPC with a public subnet.

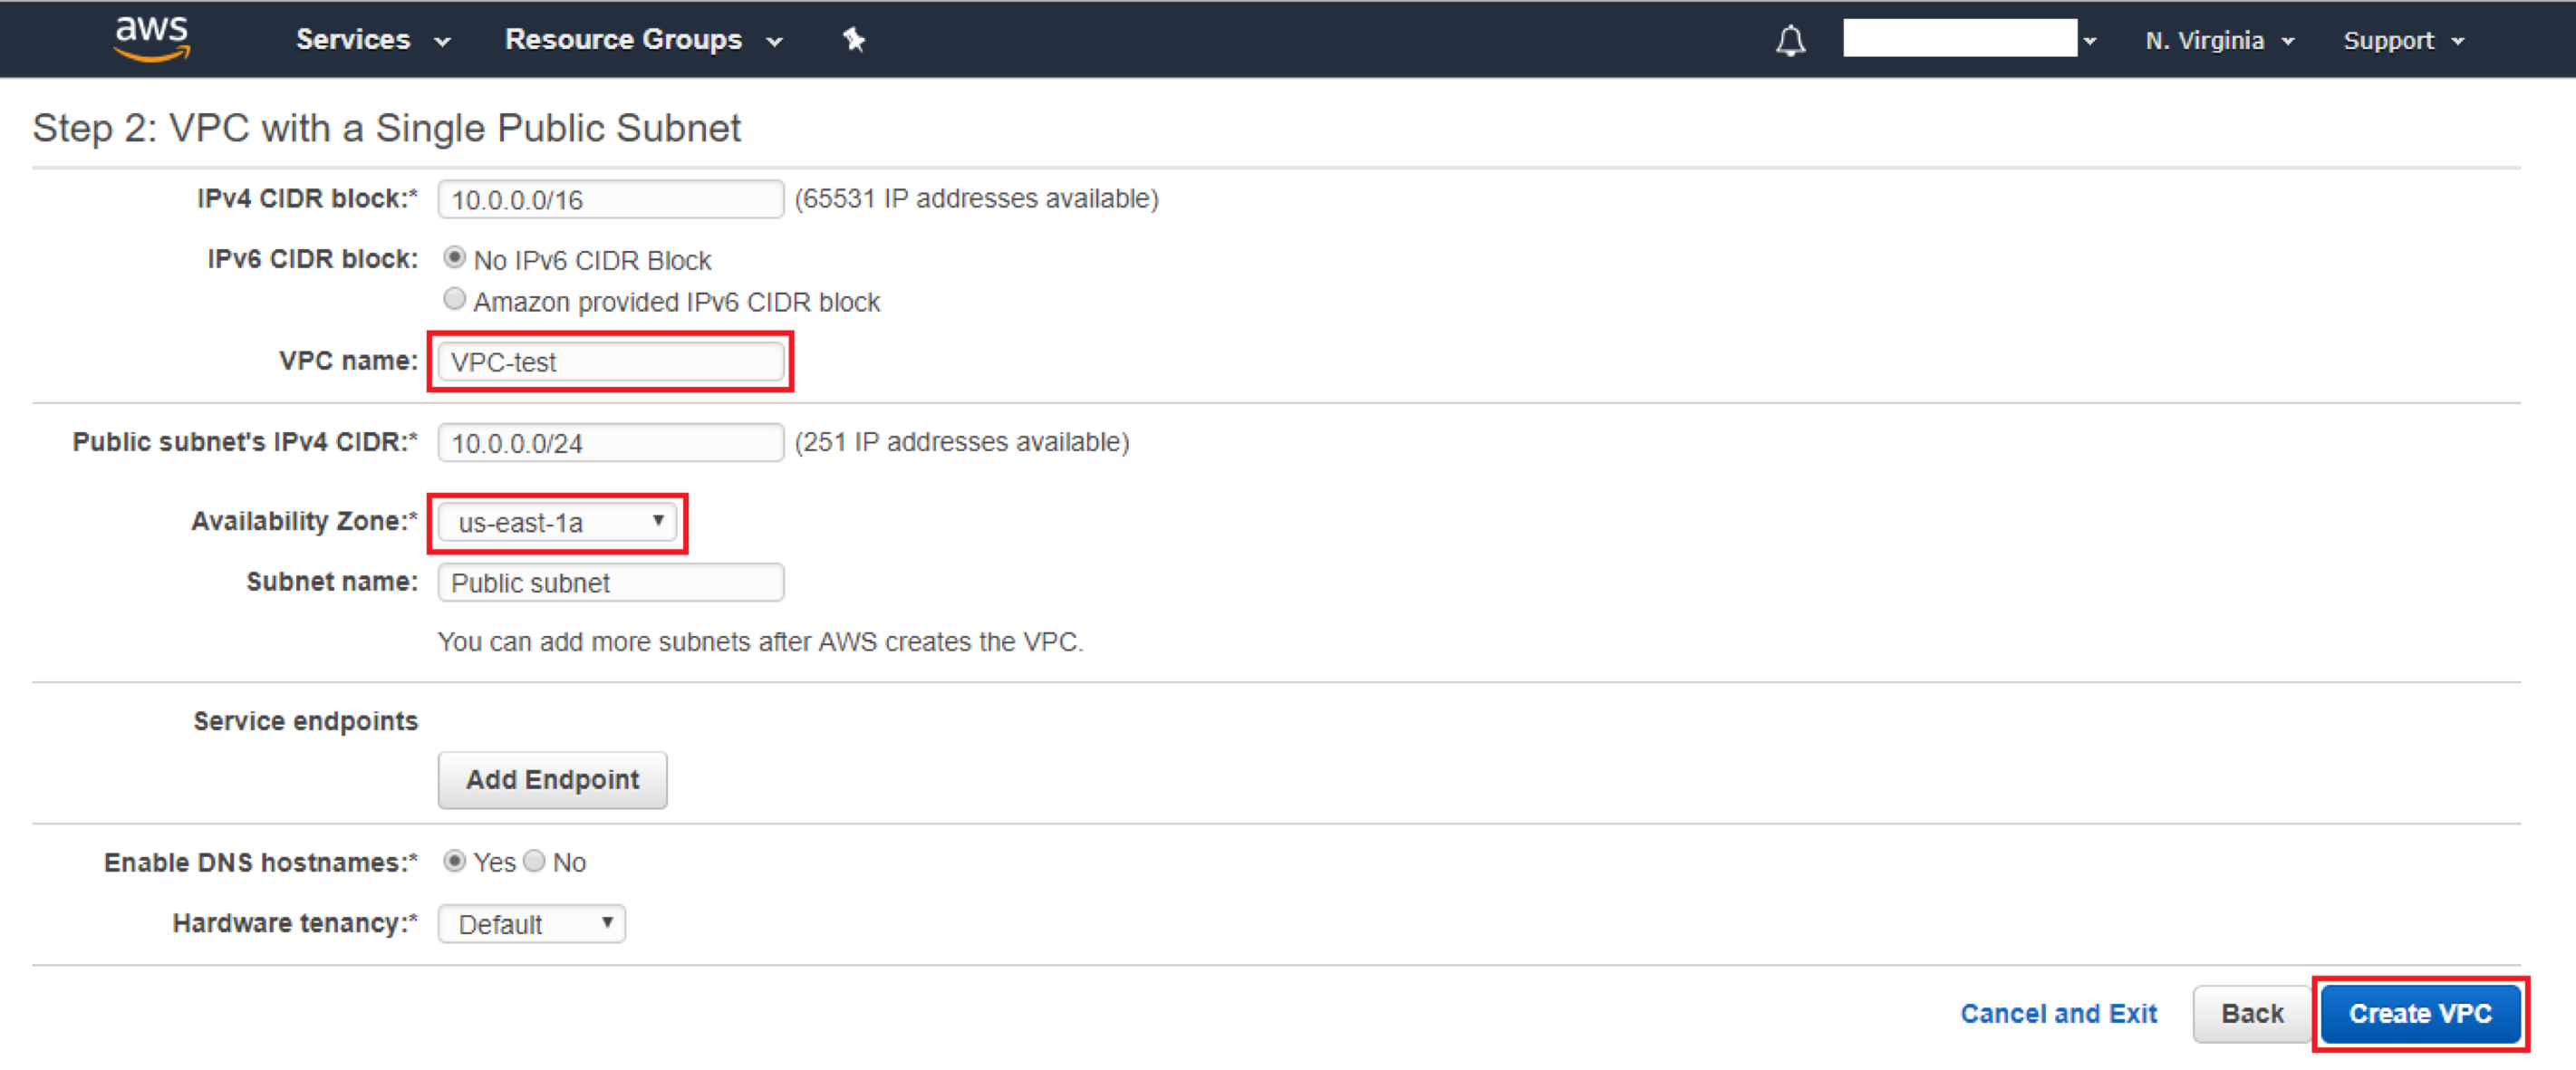
- Assign the name and area of availability to the VPC, leave the remaining fields by default and click on “Create VPC”.

- If the VPC was created correctly, a successful creation message will be displayed.
Note: To review the configuration of the VPC, select “Your VPCs” in the sidebar and the desired VPC.

- Search the subnets belonging to VPC-test by entering the VPC ID to the search bar.

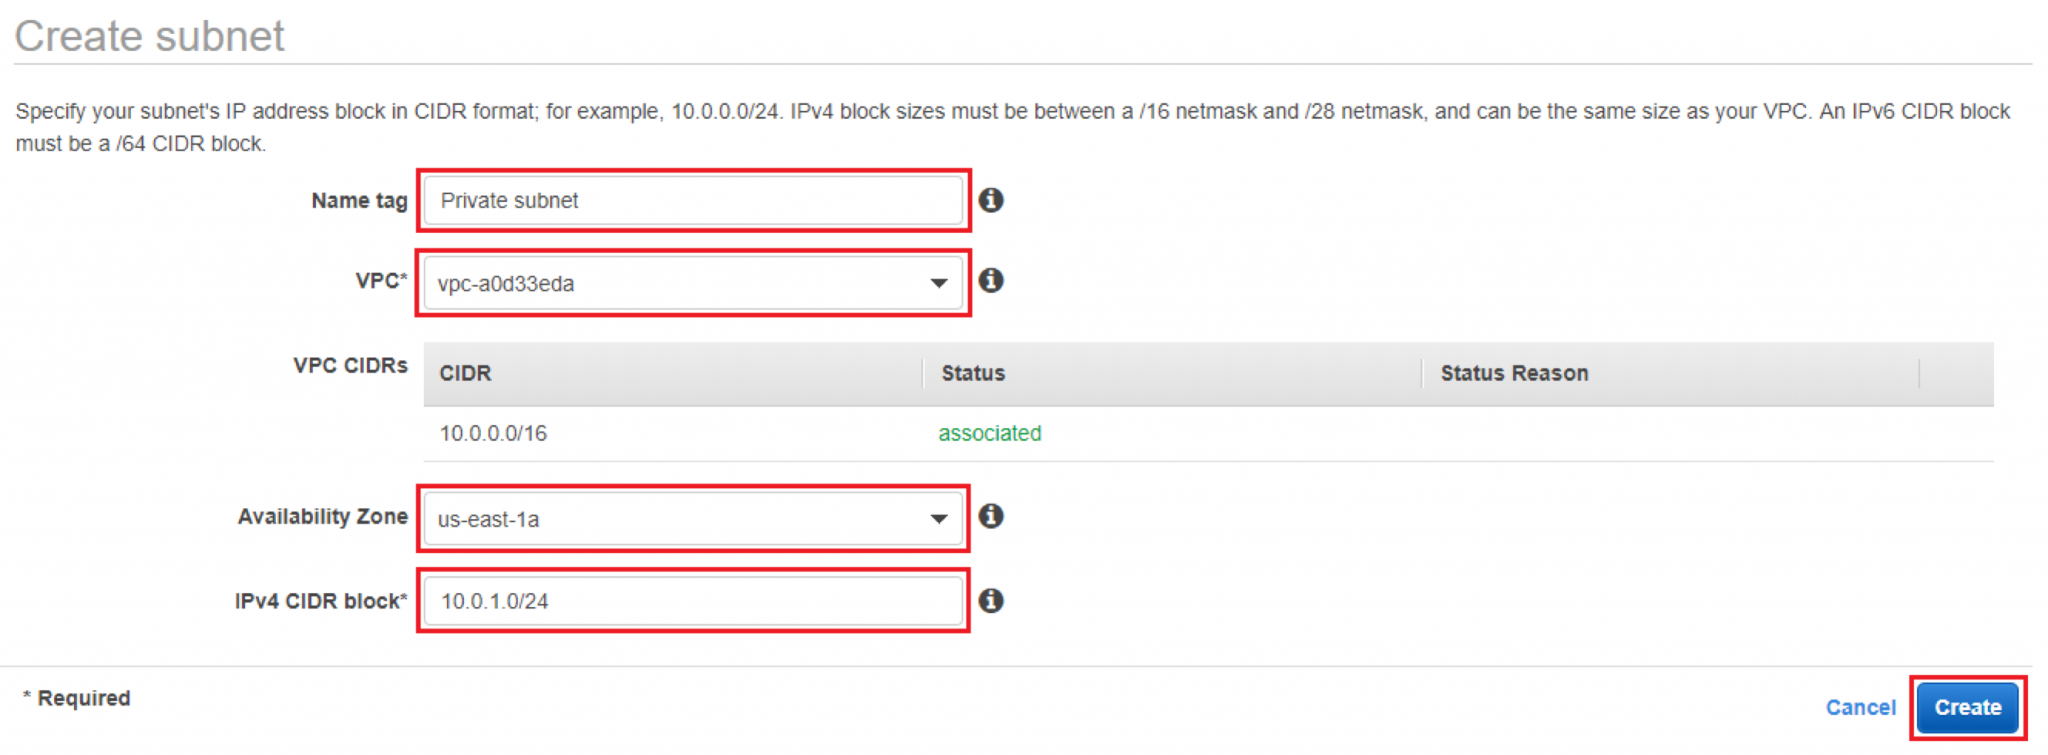
- Create a private subnet and press “Create Subnet”.

- Enter the corresponding data such as the name, the VPC created, and the block of IPs following the public subnet, in this case 10.0.1.0/24. Press “Yes, Create”.

Conclusion
Subnetwork testing will be done in part two of this tutorial series. If you have doubts about how to complete this tutorial please contact me or any of my teammates, so that we can help you to successfully achieve the VPC creation.
Remember that this blog is just the Part I of a series of tutorials, in the next weeks you are going to have the opportunity of learning how to create and configure differently instances in your AWS WordPress


